Pages (Click Here to Visit)

Showing posts with label tags. Show all posts

Wednesday, December 21, 2016

More than a Book...

Goodmorning Everyone!

Who can believe that it is only 4 sleeps until Christmas??
I hope that you are ready with all of your presents bought and wrapped!
Me...I'm not so organised but now that school holidays have begun I can finish my shopping and sort the house out ready for Christmas.

Have you entered the Scrapbookit December Challenge??
There are some gorgeous layouts already entered - check them out here on this blog to the right or by heading to the Scrapbookit Gallery.

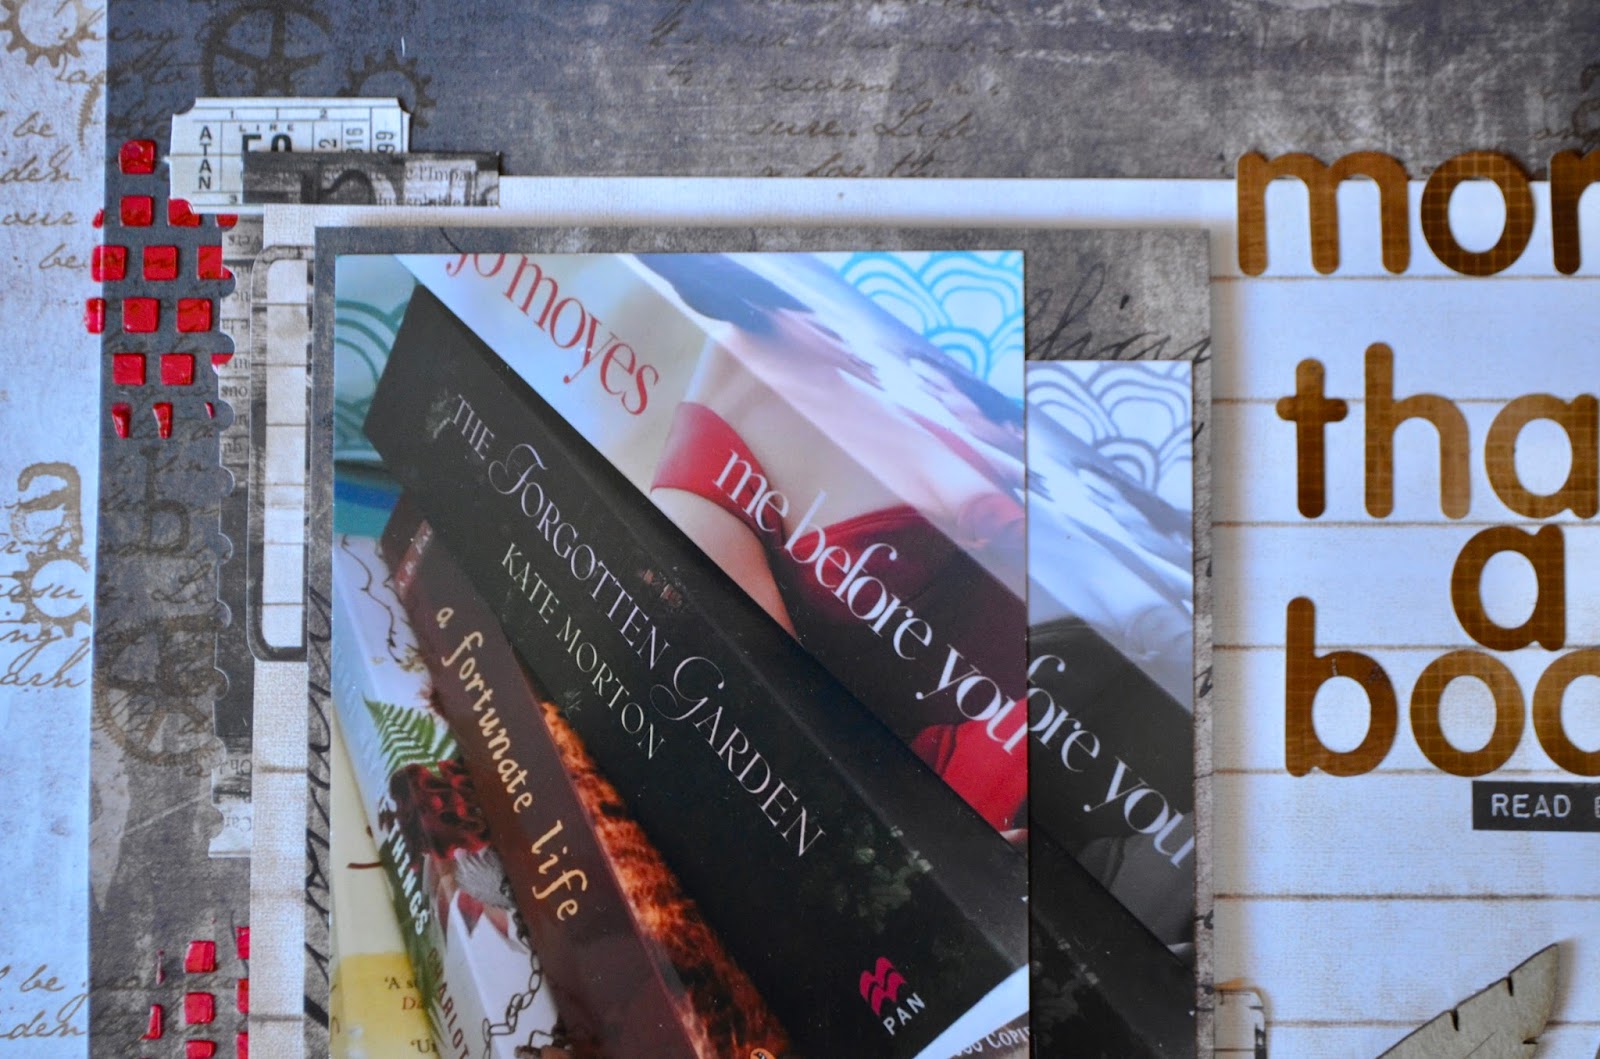
I have created another layout to share with you today using the gorgeous 7 Dots Studio - Writers Block Collection. Just recently I participated in one of those Facebook book giving posts. I was asked to participate by sharing the post and sending my favourite book to one participant. Then, hopefully, I would receive books in return...and that I did. I think I have received 6 books at this stage.
I decided that these papers were perfect to share this event, here is my layout.


As I have said, I used the gorgeous 7 Dots Studio - Writers Block Paper Collection. This collection is so perfect and can be used for so many different purposes. It has die cut elements, sticker elements and word elements that can all be used to enhance your layout. As you can see I have used a lot of these on my layout.


There is also a sheet of die cut tags in the collection. I have featured a few of these on my layout, one which I have used to write my journalling on. I have used a Scrap FX 'Feather Drawing' chipboard embellishment and some other little stickers and die cuts to embellish around my layout.


When trying to choose what type of photo to use I liked both black and white and colour so I decided to use both. I then used some Colour Blast Colour Paste - Fire Engine with a Kaisercraft Quarters Template to add a touch of red to match that on the book cover. 

Also, in the background, to pull everything in together, I have stamped using Archival Ink - Potting Soil and a couple of stamps from the Scrapbookit store as well as a Kaisercraft Script Stamp.

Finally, I have used an older Kaisercraft Collection, "Peachy Keen," sticker pack to create my title. Love it when some of the older stuff works in with the newer collections!


Well, I hope that you have enjoyed checking out my post today.
Make sure you get in and enter this month's challenge...you have until the 30th!


I would like to take this opportunity to wish you all a Merry Christmas ~ I hope you all have a lovely time together with your family and friends. Thank you also for popping into our little blog several times each month and supporting Jo and Scrapbookit this year. We love sharing our creations with you and look forward to a new year filled with lots of new challenges, projects and creations.

I'll be back on the first day of the New Year to share the new challenge with you...looking forward to sharing with you. Here's a sneak peak...

Until then,
Merry Christmas!
Melx


Friday, October 21, 2016

Christmas Is Almost Here!


I know, I know, I know!
I shouldn't mention Christmas...
It is currently a swear word in our house.
But there comes a time when we just have to get ourselves sorted and today I'll give you a plan to start.

But before that...
We had an absolute blast at the recent Scrapbookit Retreat. We laughed, ate yummy food and treats, scrapbooked, laughed and laughed...
A truly fantastic weekend...and this wouldn't have been the case if our amazing Jo hadn't of put in so much time planning, preparing, packing up the shop and reassembling the shop. We truly are very grateful, Jo, thank you so much for a great weekend. Can't wait to do it all again!

I am just here for a brief post today to share with you the class that I ran at the retreat.
Christmas Cards and Tags

Here is a look at what I created for the class...


I have used the gorgeous Kasiercraft Paper Pad 'Frosted' to create these cards and tags. I also used LOTS of the gorgeous Colour Blast products, they truly are so much fun to play with!

So here's the plan, if you love the look of these cards why not grab the Christmas Cards and Tags pack (including instructions) from Scrapbookit to get creating your own. Be sure to contact Jo (joanne@scrapbookit.com.au) today before they are all gone! 

That is all for me this morning...happy weekend!

Melx


Friday, May 22, 2015

More Back to Basics

Hey Everyone,

I'm back again for the next instalment of 
Back to Basics  by Kaisercraft...
and as promised I will show you some more of the colours of Back to Basics.

I have two projects to share with you today.
The first is a very simple Mother's Day card...


I used the Beige and Kraft papers with a touch of the Pink 
from the Back to Basics collection.
I made a cute little bunch of Kaisercraft paper blooms and finished off with a small amount of white lace. 
Simple but pretty.

Before I share my next project...have you entered our challenge for this month??
It is really such a great challenge and so easy to apply to absolutely any paper or theme.

All you need to do is include the following in your project:
* Tags (as many as you like)
* The word "Today" as your title
* Texture (add any texture you like)


You only have until the 30th of May to get your entries in, so get scrapping.

Now to my next project...

This project follows the rules of this months challenge. I had a lot of fun creating this one. There was no real order to what I did or where I put things.

This layout is called "Happy Today"


I just love this photo of my friends and I. 
We dressed up for a Bad Taste Wedding Party. It was great fun.


I have used the tag for not only the stamp but also for some hidden journalling...


For this project I have used...
Cardstock - Kaisercraft Coconut; Paper - Kaisercraft Back to Basics collection, paper doilies; Sprays - Kaisercraft Mists - Red and Orange; Template - Kaisercraft Quarters - Damask; Moulding Paste; Embellishments - Tags, Ribbon - Organza, Twine, Kaisercraft Paper Bloom Flowers, lace ribbon, Date stamp, die cut word 'Happy'; Stamp - Darkroom Door - French Script, Kaisercraft Clear Stamp -Off the Wall 'Love this.'

How seriously awesome are these Back to Basics papers? They are so easy to use and create with. Make sure you grab some from Jo at Scrapbookit.

Well that is all I have to share with you today.
I hope you are inspired to go and do some crafting today!
Whatever you are doing - enjoy!
Have a great weekend too!

Mel x

Monday, February 17, 2014

Hello Sunshine Card and Tags


Hello Everyone,

Mel here ready to share my next post for this month, February!
Thank you so much for joining us today.

It has been a crazy few weeks for me...but never crazy enough to not get some scrapping done!!

I have really enjoyed working with the 'Hello Sunshine' collection by Kaisercraft this month.

Today I have two little projects to share with you...the first being another card (the second for the month - that is HUGE for me!)

I had so much fun creating this card. 
Here it is...


How cute is that owl???

The owl is actually the Kaisercraft Owl Template.
I used it as a mask and used some Kaisercraft 'Gumleaf' Ink Pad to get the shape. Then I used my newly obtained Faber Castell 'Gelatos' to add colour to the image.

Here are the products used for this card...
Black Cardstock; Kaisercraft 'Hello Sunshine' paper collection; Cosmo Cricket Tiny Type Alpha Stickers; Coloubox Fluid Chalk Inkpad - Blackbird; Black Fineliner; Kaisercraft Owl Template; Kaisercraft Inkpad - Gumleaf; Faber Castell - Gelatos


Now for my second project.
I have to honest with you...I have this addiction to tags!
I love making them. Not only do they look good when they are finished but they are quick, easy and use up scraps of paper.

This month I have made 6 tags, again using the 'Hello Sunshine' paper collection.
Here they are photographed all together...


I have also photographed them separately so that you can see them better. And...I have photographed the backs too!


As I said....easy to make and they look great!

Here are the products used for these tags...
Manilla Tags; Kaisercraft 'Hello Sunshine' paper collection; Kaisercraft 'Hello Sunshine' Collectables; Kaisercraft 'Hello Sunshine' Sticker Sheet; Kaisercraft 'Hello Sunshine' Sticker Sheet - Alpha; Twine; Tim Holtz - Distress Stains - Barn Door and Rusty Hinge; Kaisercraft 'Love By Hand' stamp; Black Fineliner; Kaisercraft Inkpad - Gumleaf; Polka Doodles - Stamp Doodles stamps; Kaisercraft - Mini Clear Stamps - Thank you.

Have you kept up to date with what the rest of our very talented design team have been creating??
If not, make sure you head back through the posts to see what you have missed out on. Be sure to leave the girls a comment...they love to hear what you think of their work.

Not long now until our next retreat...just over a month.
Have you booked your spot?? 
If not, you can do so by contacting Jo (joanne@scrapbookit.com.au).

Last but not least...don't forget that you still have time to get your entry in for this month's challenge for your chance to win some goodies from Scrapbookit!
Can't wait to see what you come up with.
Details of challenge and how to enter are on the right sidebar of this blog.

Hope you have found something to spark your creativity today!

Mel :)


Wednesday, December 25, 2013

Merry Christmas Everyone!

Merry Christmas Everyone!

A brief post this morning on behalf of Jo and the Scrapbookit Design Team to wish everyone a very Merry Christmas.

We hope that you spend today sharing lots of special family time with all of those that you love. Don't forget some pudding and some gift giving too!

From all of us ~ Merry Christmas! Have a great day!

Here are a few gift tags that I have created this Christmas...


Friday, December 13, 2013

Project #1 December 2013


Hello Everyone,

Can you believe that it is nearly Christmas? I can't!
I hope that you are all ready for Christmas and your shopping is done.
I haven't even started yet!!!

This month our gorgeous Guest Designer, Amanda Francis, has set the challenge for us. Amanda set the challenge of using Paint and Spray in our projects.

My role on the Scrapbookit Design Team has changed a little, we have decided to mix it up a bit. So my role now is to try and inspire you with a few different projects…you know a bit of this and a bit of that!

This month I have returned to some instructions for a ‘One Page Wonder - Mini Album’ which I received years and years ago from my gorgeous friend Jaine…she was always very clever with her designing and creating.

I had a lot of fun creating this mini album so I thought I would share the instructions with you.


I have been very lucky this month to receive the gorgeous Authentique ‘Joyous’ collection and some other bits and pieces to play with.

The first step of this project is to score a piece of cardstock so that you have a checkerboard effect. This will involve scoring three vertical lines (I scored the centre first and then scored half again) then you will need to turn your page one turn and score three vertical lines.

Then, you will need to cut along the scored lines.
Along the first line you need to cut from the bottom to the top intersection. For the second line you need to cut along the score line from the top down to the bottom intersection. The third line needs to be the same as the first line. You are now ready to fold your card stock into the mini album.


Once you have folded your mini album you will need to adhere some of the pages together. However, make sure on the first, third, fifth and seventh pages you only tape 3 sides to make pockets to slide a tag/s or other memorabilia in.

You will then need to cut two pieces of chipboard to become the front and back covers of your album. I have sprayed the edges of my chipboard covers with Dylusions ‘Cut Grass’ Ink Spray. Before you stick the covers on you will need to attach the ribbon underneath the cardstock. This will be used to tie up your album once complete.


It is now up to you how you might decorate your mini album. I have used strips of paper from the collection as well as some of the card stock elements. I have used Kaisercraft ‘Christmas Sentiments’ and ‘Christmas Card’ Rub ons. The clear stamps ‘Christmas Sentiments’ and ‘Christmas Quotes’ by Kaisercraft were also used.


I used some plain card tags and have decorated them using some of the above products but I have also used Tattered Angels ‘Brick’ Glimmermist for my spraying and Tim Holtz ‘Fired Brick’ Distress Ink around the edges.


Throughout the album and on my tags I have used a VERY VERY old christmas stencil and a mixture of Texture Paste and green paint to add some Christmas trees and stars. 

As you can see I haven’t added any photos…I am not sure that I want this album to display photos or for it to be something else….maybe a little quote book or a remember when…book; somewhere to write down our little Christmas traditions in our family…I’m not sure???

Well, that is my first little project for the month. I hope that you have been inspired. It is always nice when you can create something out of one sheet of cardstock. 

Thanks heaps to Amanda for being our Guest Designer this month. I have loved using sprays and paints. If you would like to check out some more of Amanda’s work head on over to her blog…

Make sure you head on over to the Scrapbookit Online Store or email Joanne to grab all you need to complete a One Sheet Wonder Mini Album. If you would like some more detailed instructions for this project please send me an email…melfield30@gmail.com. Then you have until the 30th of December to get your entry for this challenge submitted to Joanne.

Make sure you pop back in over the next few weeks to see more projects from our wonderfully talented Design Team and I look forward to checking in with you just before Christmas to share another project.

Happy Scrapping,

Mel