Pages (Click Here to Visit)

Showing posts with label Dylusions. Show all posts

Friday, September 14, 2018

You and Me!

Hello and welcome to my second post for the month.
I have had a lot of fun with this layout once again using the 49 market cottage life paper pack.
Here is my Layout.
 I have started my layout by using a piece of the patterned cardstock and one of my Dylusions brick wall stencils and have then added some Ranger distress oxide in the colours Barn door and
Cracked pistachio. I layered lots of different patterned paper under my photo as well as using my die cutter machine and Kaisercraft die and placing these around the page as well.
I have fussy cut the ladder and some of the flowers from the patterned paper then added some cocoa vanilla flowers that were in my stash.


I still had some of the gorgeous Uniquely Creative lace butterflies left from the last layout so I added some of them to my page and fussy cut some butterflies out as well.
My little word stickers were also from an old cocoa vanilla range that I had.
So far this month we have some excellent entries which is so great to see.


For your chance to be in the running for a voucher to www.scrapbookit.com simply complete a layout using our challenge criteria and email it to us here or even easier just upload it to our Scrapbookit facebook page.
Thanks for stopping by today.
Jane xxx 


Sunday, August 5, 2018

Imagine!

Good Morning!
I have a ripper of a layout for you all to start the month off. In following Jo's challenge which is anything to do with the word Imagine. When I heard what the challenge was going to be I just knew that I had to use this picture of my daughter Rahni taken whilst we were away in QLD recently.

I have made a very busy layout with a lot of products BUT I am very happy with the final result and I think it all works!
 Here's my Layout.

To begin I used some Kaisercraft white cardstock, using the packaging technique I have used some Dylusions Rose Quartz and Bubble-gum

Pink ink spray which I randomly smooshed (haha is that even a word) all over the page, I then used a Darkroom Door Arty Circles stencil with some Dylusions Peony blush paint and randomly placed these circles over the top of the ink. Some splatters of Tim Holtz Tarnished Brass Distress Spray Stain and also some of the Heidi Swapp Mint Color Shine and my background was finished.
 

The paper I have used behind the photo was Echo Park Imagine That, I randomly cut circles out freehand and glued them mostly just in the middle part of the page. I added some doodles over the top of some of the circles and around the edge of the page.


How cool is that striped Washi I have used sporadically around the page? its kind of hard to see but it has the cutest little gold pineapples on it. Just adorable. It came in a pack of four from Creative PL.


For my Imagine chippy which is from The Dust Attic I used some Ranger blendable dye ink in Garden Patina, I then added some Gold Metallic Gilding Wax over the top, I REALLY love the effect this has given the chippy.

To finish my Layout I have added some cute little hearts that I have punched with my tiny heart punch and added the quote up the top which I love and I think was very appropriate for the photo and the theme!


Thanks for stopping by
Janexx

Tuesday, June 5, 2018

The 2 of Us

Good morning Everyone!

Many thanks for joining us here at Scrapbookit.

Today I am here to share with you my take on Jane's June Challenge.
Have you seen the requirements?
It is such a great challenge!

All you need to do is use:
*The Sketch
and 2 or more of the following:
*Washi
*Watercolours
*Stamps
*Stencils

Image result for pagemaps sketches

This month I am using the new collection by Kaisercraft 'Stargazer.'
It is quite a different collection for Kaisercraft but very lovely. 
I have loved using it for this challenge.

Here is what I came up with...


I giggled when I read Jane's post the other day...great minds think alike...we both used washi for the little flags!!! I have used some SP Washi and a few other washi tapes that I had.

I started with using my watercolours in a variety of different tones of blue and grey. I also splattered some Dylusions Ink Spray ~ Periwinkle Blue as well as the Dylusions ~ Black Marble around the background.


I have used the sensational patterned papers of this collection for the squares. It's not easy to find photos that you can trim to 2" by 2" size, so I printed my photos to the size. These were some selfies of us in Thailand earlier in the year.
It is a little hard to see in the photos but I have actually raised the photos. I just thought that by doing that they are now the focus of the layout.

I have decorated some of the squares with collectables or stickers from the pack. 
How gorgeous is the border sticker with the dots that I have used at the bottom of the larger square??

I added a little feature of the collectables in the corner (In my true style...it is my addition to the sketch 😬 whoops! I couldn't help myself!!)


In the collectables I found this gorgeous Mother Teresa quote. I love it...and so appropriate!

I have used the Uniquely Creative Clear Stamp Set - Have a Blast which contains the stamp 'You Mean the World to Me.' I just LOVE these stamps...they are very cool but most importantly they stamp so precisely! You should check them out!!

My journalling I printed from my laptop using the American Typewriter font!

Lastly, I used some American Crafts Foam Thickers from my stash called "Delight"


So in the end, I have used the sketch and all bar one of the extra requirements...

Now, all of these products you can grab at Scrapbookit...if you can't find them in the shop...just send Jo a message, she will get you sorted!
That Kaiser collection and those Uniquely Creative Clear Stamps are a MUST HAVE!

I hope that you have enjoyed checking out my take on the challenge today and make sure you pop back in as Jo's take is the next up in a few days! I'm sure it will be magnificent!!

Happy Scrapping Everyone!
x Mel x


Friday, May 11, 2018

Love This Kid!


Hey Everyone!

Well, hasn't this been lovely...popping in to Scrapbookit everyday!!!

Today I am here to share with you the first of the layouts that I created at the Cocoa Vanilla Retreat.
It is funny actually because I used one of the first Cocoa Vanilla collections ~ from back in 2015 called Flying High!!!
I loved this collection from the moment I laid eyes on it. Soooo good for those little boy pages I create. I think I have also used it for many baby boy gifts and cards...and I did at the retreat create a quick little card using it!

Another of the challenges Zoe presented us with was a Sketch Challenge. These are always good to get you going...therefore why I started with it, I guess!

Here is the sketch...


Here is my layout Love This Kid!


I started with some Heidi Swapp Colourshine in Navy as well as a small amount of the Dylusions Spray - Postbox Red.

I have then layered papers from You Rock and Flying High to create my layout.
It is so awesome that so many of the Cocoa Vanilla papers can be mixed and matched across collections.

I also used embellishments from the Flying High Accessory Stickers, the Flair Button Badges and the Wood Veneers.

I finished off by painting the Scrap FX Wordlet phrase...'Love this Kid' with the Heidi Swapp Colourshine - Navy spray.

Only 7 sleeps until our Autumn Retreat!! How exciting!
Should be a fun weekend.

Check back in the morning for my next instalment...

~xx Mel xx~


Wednesday, April 25, 2018

Remember.

Remember.
Hello and welcome to my second blog post for April. I have once again used the BoBunny Penelope paper range for this layout. The brown and blue colours in this paper range threw me a bit so I decided to add a little bit of purple to help tie all the colours in with my photo.
This is what I came up with.

This photo is of my husband's grandparent's at our wedding almost 15 years ago. They are both extremely special people and I loved how this photo went with this particular paper range, hence the reason why I used it.


I started with a piece of Kaisercraft cardstock, added another piece of cardstock over the top and tore the paper in a few places and added an embellishment under the tear. I then used all of the different patterned paper and tore them as well to create my background. I used my Kaisercraft die and stamp set to make some of the flower and butterfly embellishments and I then coloured these in using some Dylusions paint in the Crushed Grape which I also diluted down a bit.


I did some more fussy cutting of the blue flowers and then added some of the small Kaisercraft blooms and a purple felt flower.
I also scattered around some small wooden hearts and finished my layout with some purple splatters.
The Remember chipboard was from my stash and I painted it with the Crushed Grape paint and then added some of the Glossy Accents over the top to make it shiny, I love the effect this gives.


Do you have your entry in yet for our April challenge? You could be in the running for a gift voucher to spend at www.scrapbookitshop.com.au
We can't wait to see what you can come up with.
Thanks for stopping by Jane xxx 

Saturday, March 10, 2018

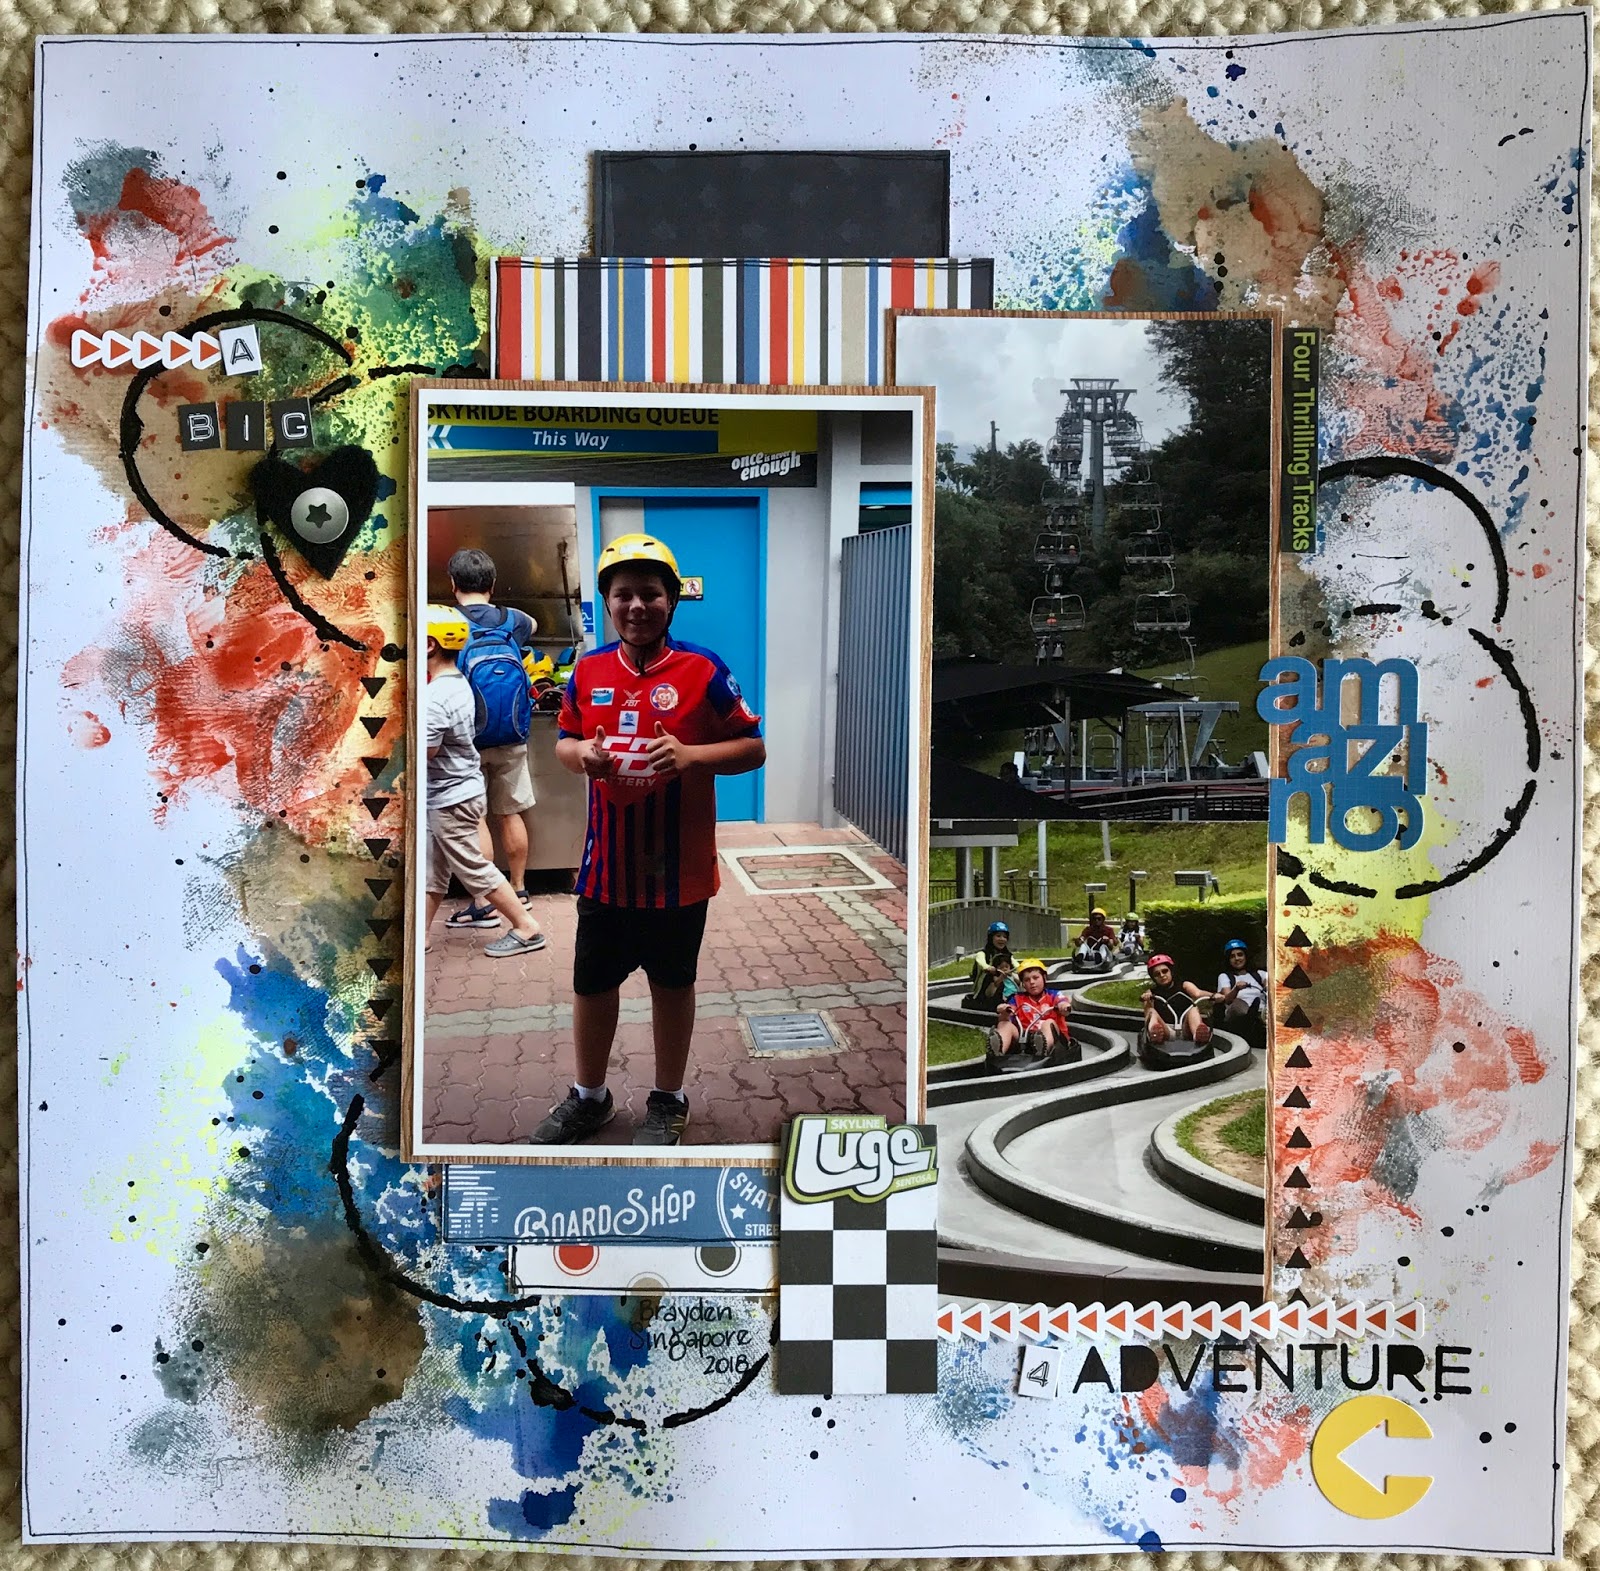
A Big ♡ For Adventure!

Welcome to Saturday!
Happy Long Weekend to those of you in Victoria!

Today I am here to share with you my interpretation of Jane's awesome challenge for this month at Scrapbookit!

The challenge requirements are:

*Use circles, hearts, rectangles and triangles on your layout, card or journal page.

*Make reference to a shape in your title ie, Circle of Life, Follow Your Heart, You're A Star etc

*Include on your layout, card or journal page a technique OR product that you have never tried or used before.

What a great list of requirements and so many things that you can do, so many ways to cover off the requirements of the challenge!

And you know the best thing...you could be the lucky winner of an awesome Scrapbookit prize! A $30 voucher in fact!!!!!

For those of you who know me...you may be aware that I have been struggling with reviving my mojo! This is what happens when you step away from your craft room for several weeks in a row...I was overseas which was amazing...but I definitely lost my mojo :(

The first decision I had to make when working on this project was what technique or product I would feature that I have never tried or used before.
I decided in the end to go with the plastic packaging technique (I'm not sure that it has an official name) to create a background.
This took a few attempts...as you can see.


My background turned out like this...


To create this background I used a plastic package, sprayed a colour onto the plastic and then turned it over onto the cardstock and moved the colour around using my fingers.
I started with the Colour Blast Colour Spray - Saffron, I also used Dylusions Spray - Periwinkle Blue. 
I decided to see if I could get the same effect using Colour Blast Shimmer Cube - Tangareen Dream. I loved how it gave a subtle shimmer to the layout.
I then added some Colour Blast Colour Spray - Coffee using the same plastic packaging technique.

I then used a piece of cheesecloth/gauze and some Heidi Swapp Colour Shine - Navy to add small amounts of what turned out to be a grey colour.

Here are a few close ups...you can just see the print of the cheesecloth.


I then splattered a small amount of Dylusions Black Marble Spray.


Once dried, I used some of the papers from my Photo Play kit this month called Freestyle.
This is what I finished up with.


I have incorporated the shape part of the challenge with black paint and the Kaisercraft Mini Template Splatter for the large circles in the background. I have arranged my photos and papers in rectangle shapes. I have used triangles from the sticker element sheet from the Freestyle kit and have used a Kaisercraft Template - Quarters and my fineliner.
I have only one heart which I have cut out of black felt.

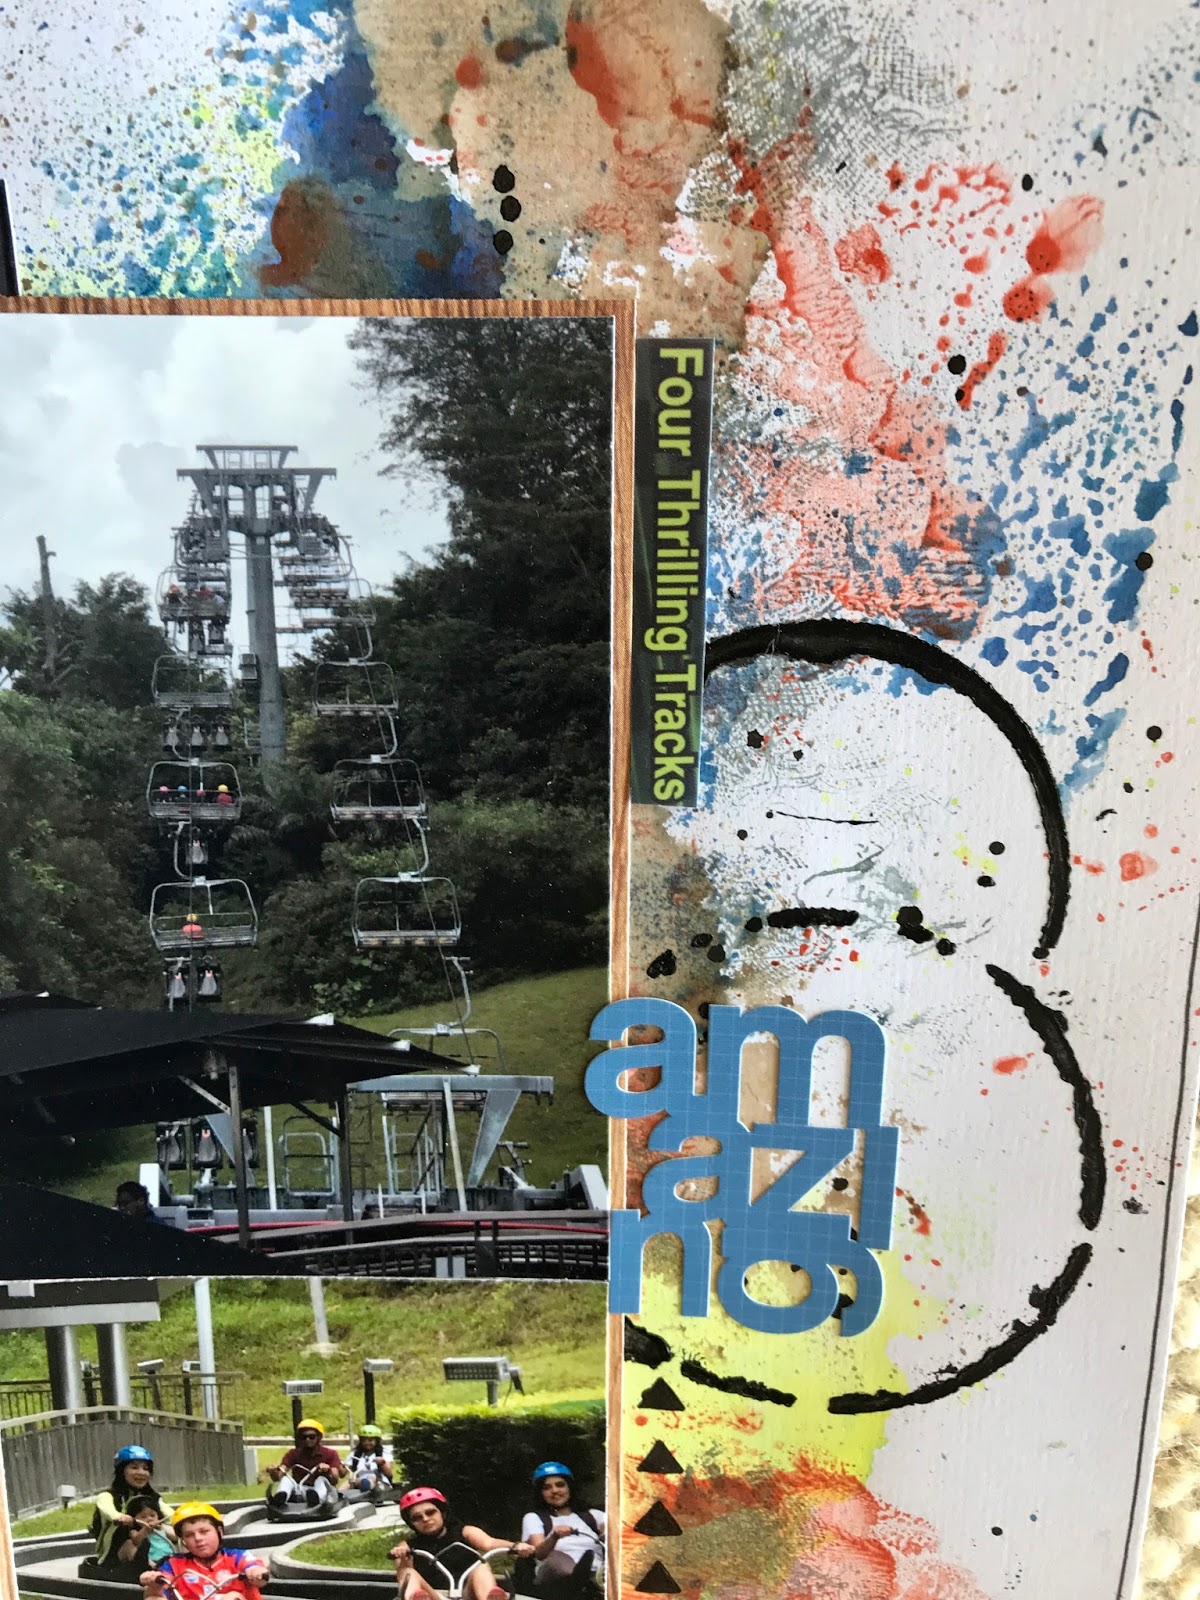
Some more close ups...

I have used the word 'amazing' from the sticker element sheet from the Photoplay Freestyle kit.
I have also used some cut out words from my photos, including the Skyline Luge Sentosa logo.


I finished with my title which I have created using the Kaisercraft Dymo Alpha Stickers in both Black and White and the word adventure from the Echo Pack Dream Vacation Stencil.


I am so happy with this layout...and I feel like I have a little of my mojo back!

Head to Scrapbookit Shop to grab some of these awesome items...the Photo Play Freestyle kit is a great boy collection!! 

Why not spend this weekend getting creative with Jane's awesome challenge??

We can't wait to see what you come up with...add your entry to our Facebook page, the blog or email it to Jo at joannecaird@gmail.com.

Melx

Tuesday, February 20, 2018

Who said Winter had to be drab!!

Hello!
I'm back with another layout to share with you all.
 I had a lot of fun with this layout, using a photo of my youngest son Sebby and I. Once again I have used the 7 dots studio - Northern Lights Paper Collection.


I started my Layout with a patterned piece of paper then added some Gesso to the background, I then mixed some of the Colour Blast - Colour Artist Ink in Berry with some gesso and painted it around the page, then I used a Kaisercraft stencil and added some stencilling over the top with my Dylusions paint in the vibrant turquoise, some of these I highlighted with my black sharpie pen just to help make them standout a bit. Next I added a whole lot of different patterned paper which I tore some of the edges and added some doodling to as well.


I added some splatters of spray with the Colour Blast - Colour Spray in Road Base and also some of the Lindy's Stamp Gang Starburst spray in Tibetan Poppy Teal! This spray has the most gorgeous shine to it, it's Amazing!
I then added my pictures which I had backed with some black Kaisercraft cardstock and then added my title with some script font and some black lettering from my stash!


 Added some of the tags and stickers from the paper pack, and cut out this gorgeous Uniquely Creative Light Bulb Metal Die on the right hand side of my page with my sizzix and some sparkly turquoise paper and my layout is complete!
Have you entered our Challenge for this month yet? Jo is very generously donating a store gift voucher to the lucky winner! How good is that?!?!
Saturday we had our monthly crop day and had such a lovely day, Jo runs these crop days from her beautiful home and they are available for anyone to come and scrap for the day and have a little shop whilst they are at it!
Everything I have used on my Layout today is available to purchase from www.scrapbookitshop.com.au head on over and have a look!
Thanks for your time today, I'm up next month with another exciting challenge I have created! Can't wait to share it with you all!
Until then Happy Scrapping
Jane xxx


Wednesday, November 15, 2017

Stop and Smell the Roses!

Hello
I'm back again with another "Spring" themed layout, this photo is of my daughter quite a few years ago. Whilst I wasn't entirely sure that the red in her dress matched this paper I decided to use it anyway and I'm quite happy with the way it turned out.

I used the Ultimate Crafts 'Bohemian Bouquet' paper  range.
 I have done quite a bit of fussy cutting and also layering of the different patterned paper.
The clear sticker down the bottom of the page is a Kaisercraft clear sticker and the Script Font I have just done with a sharpie.
With my Butterflies I have used a piece of white cardstock and played with some different coloured Dylusions Inks, I have then used the Kaisercraft Butterfly Die and cut some Butterflies out of it, I really Love the effect this has given the Butterflies they are a beautiful shimmery colour and add an extra element to my page. I have stuck them don with some Ranger Glossy Accents.
I had a lot of fun with this page.


I'm looking forward to seeing everybody's take on my Spring challenge, I want to see a huge amount of entries this month! There are some great prizes to be won!
Have you been over to the all NEW www.scrapbookitshop.com.au website yet? It's looking Amazing and Jo is loading new product's all the time!
Thanks for stopping by
Jane xxx

Wednesday, November 1, 2017

November Challenge!

Hello and Welcome to our November Challenge here at Scrapbookit.
This month the papers that I got to work with reminded me a lot of Spring, which is where I got the idea for this month's challenge. So for this month the Challenge is to use the Quote
'Live Life in Full Bloom'
and to include three(3) things on your Layout that begin with the Letter S! Easy right...

Here is my Layout.


I have worked with Ultimate Craft's 'Bohemian Bouquet' paper pad. I have used the quote across the top of the page and  I have written this with a permanent marker.
My three 'S' are:
Sunshine Colour Blast shimmer cubes
Stamping-Butterfly
Stencils


I started my layout by making a patchwork background with different colour blue papers out of the paper pack, I then used a butterfly stamp with some Colour Blast Shimmer cubes in the Sunshine colour and applied these to my background as well. I fussy cut the flowers down the right hand side of the page and added some of the butterflies that go with the paper collection.


The large piece of paper behind my photo I sprayed with some Dylusions Spray, added some more of the Colour Blast Shimmer Cube in Sunshine and then I added some texture with some Colour blast texture paste and a script font stencil.


The dream catcher wood chippy is also from the Ultimate Craft collection, I covered it with some Ken Oliver Crafts Liquid Metal in Yellow Gold and added some glossy accents over the top and finished it off with some twine.


The little word stickers I have used from a Kaisercraft sticker book, I found these matched really well and was happy with the final touch it made to the page.
The little flowers are from Cocoa Vanilla.
All of the products that I have used on this layout are available from www.scrapbookitshop.com.au.   Jo has such an amazing range of products in her online shop, I can highly recommend that you have a look.

I hope that you have enjoyed my Layout and my challenge for the month.

I look forward to seeing all of your entries.

Thanks for stopping by Jane xxx