Pages (Click Here to Visit)

Showing posts with label watercolours. Show all posts

Tuesday, June 5, 2018

The 2 of Us

Good morning Everyone!

Many thanks for joining us here at Scrapbookit.

Today I am here to share with you my take on Jane's June Challenge.
Have you seen the requirements?
It is such a great challenge!

All you need to do is use:
*The Sketch
and 2 or more of the following:
*Washi
*Watercolours
*Stamps
*Stencils

Image result for pagemaps sketches

This month I am using the new collection by Kaisercraft 'Stargazer.'
It is quite a different collection for Kaisercraft but very lovely. 
I have loved using it for this challenge.

Here is what I came up with...


I giggled when I read Jane's post the other day...great minds think alike...we both used washi for the little flags!!! I have used some SP Washi and a few other washi tapes that I had.

I started with using my watercolours in a variety of different tones of blue and grey. I also splattered some Dylusions Ink Spray ~ Periwinkle Blue as well as the Dylusions ~ Black Marble around the background.


I have used the sensational patterned papers of this collection for the squares. It's not easy to find photos that you can trim to 2" by 2" size, so I printed my photos to the size. These were some selfies of us in Thailand earlier in the year.
It is a little hard to see in the photos but I have actually raised the photos. I just thought that by doing that they are now the focus of the layout.

I have decorated some of the squares with collectables or stickers from the pack. 
How gorgeous is the border sticker with the dots that I have used at the bottom of the larger square??

I added a little feature of the collectables in the corner (In my true style...it is my addition to the sketch 😬 whoops! I couldn't help myself!!)


In the collectables I found this gorgeous Mother Teresa quote. I love it...and so appropriate!

I have used the Uniquely Creative Clear Stamp Set - Have a Blast which contains the stamp 'You Mean the World to Me.' I just LOVE these stamps...they are very cool but most importantly they stamp so precisely! You should check them out!!

My journalling I printed from my laptop using the American Typewriter font!

Lastly, I used some American Crafts Foam Thickers from my stash called "Delight"


So in the end, I have used the sketch and all bar one of the extra requirements...

Now, all of these products you can grab at Scrapbookit...if you can't find them in the shop...just send Jo a message, she will get you sorted!
That Kaiser collection and those Uniquely Creative Clear Stamps are a MUST HAVE!

I hope that you have enjoyed checking out my take on the challenge today and make sure you pop back in as Jo's take is the next up in a few days! I'm sure it will be magnificent!!

Happy Scrapping Everyone!
x Mel x


Tuesday, May 23, 2017

A Sneaky Post....YOU ROCK!

Happy Tuesday Everyone!

I am being a little sneaky today and have jumped on to share with you a really fun layout that I have done recently!
If you follow us regularly you would know that we just had our Autumn Retreat in the beautiful Victorian town, Bright. It was a heap of fun (as it always is)! A huge thank you to Jo for her planning and organisation of the weekend...it was superb!

I ran a workshop on the weekend using two of the newest Australian products on the market...Colour Blast Shimmer Pots and the Cocoa Vanilla Collection 'You Rock'!

I have stopped by to share with you the process in creating my layout that I used in the workshop. The ladies that joined me were a little unsure to begin with but in the end I believe that they were all very impressed with their creations. They were all very different to mine...which I love...our aim was to have a play with the product and to delve into our own creativity not to create identical layouts!

If you would like to follow with this process you will need the following products which are all available on the Scrapbookit Online Store (http://www.scrapbookit.com.au/online-shop.aspx
*White Cardstock 
*Cocoa Vanilla 'You Rock' Ephemera
*Cocoa Vanilla 'You Rock' Washi Stickers
*Colour Blast Shimmer Cubes - Sunshine, Tangareen Dream & Just Blue
*Colour Blast Colour Paste - Sunshine, Tangareen Dream & Just Blue
*Gel Medium 
*Kaisercraft Mini Template - Woven
*Kaisercraft Mini Template -Rough Grid

I have also used plain water colour paints in my background. 

Here goes...I hope you enjoy!
Step 1: Planning
Whilst this may change at the very end...I always like to have a bit of an idea in my head as to what I would like my finished project to look like. Often it dramatically changes but that's ok.
I took my Cocoa Vanilla 'You Rock' Ephemera and sorted through the pieces and placed them roughly with my photo to create a bit of a plan.


Step 2: Let's get messy!
Now that I had a plan in my mind it was time to create my background. Prior to this project I had had a play around with the products that I was using, especially the new Shimmer Cubes from Colour Blast.

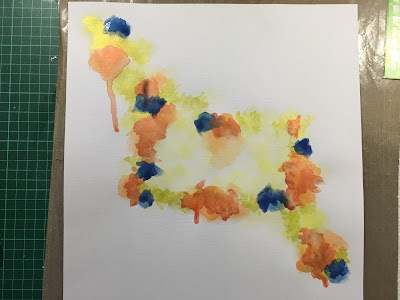
The first layer that I created was using the plain water colour paints.  It doesn't matter what water colour paints you have, they all work! The only difference being possibly the intensity of the colour or quality of the colour...saying that the most expensive aren't always the most ideal. I have a variety of options and what I looked for was the colour matching with the Shimmer Cubes. 

I started with the lightest colour first...I used a makeup sponge to apply the colour.
  

 It is important to remember that the more water that you add the lighter the colour on your page and then obviously the less water the darker the colour.
You may also need to add a few layers to get the colour that you are looking for.


I continued adding the two other colours. I didn't dry the colours in between to allow for a little blending to occur. I also often squeezed the sponge and colour onto the page to make puddles that I allowed to dry naturally.


I tried not to go overboard with this water colour background as I knew that I would be adding to this the Shimmer Cubes colour.
Once happy with it I dried it off before moving onto using the Colour Blast Shimmer Cubes.

Step 3: Colour Blast Shimmer Cubes
I followed a very similar process but this time I used a larger water colour brush.
The Colour Blast Shimmer Cubes are so easy to use. You can spray water into the cube or you can wet your brush/sponge and collect the colour.
Again, I layered the colour to get the intensity that I liked and I also squeezed the water and colour from my brush to make puddles. I was able to create drips of colour by doing this.

The shimmer is hard to see in photos...but it is absolutely gorgeous!

Step 4: Gel Medium and Shimmer Cubes
I decided to add another texture to my layout using Gel Medium and the Colour Blast Shimmer Cubes. Basically I used a small amount of Gel Medium and some of the Shimmer Cube 'Just Blue' and mixed them together on my craft mat.
Try not to use too much water in this process as it takes away the texture from the Gel Medium when it dries.
Once the colour is mixed through I applied it to my layout in random places using one of the new Kaisercraft Mini Templates - Woven.

 
  I allowed this to dry.

Step 5: Colour Blast Colour Paste and Splatters
I then used another of the new Kaisercraft Mini Templates - Rough Grid with the Colour Blast Colour Pastes. This is the darker colour squares that you can see on the page.

The last thing I added to my background were some splatters using the Colour Blast Shimmer Cubes.
To do this make sure you add plenty of water to the colour and flick your brush around the page.


A few tips with the cubes...(From the Colour Blast website)
*Make sure that after you have used them that they are completely dry before replacing their lids.
*Do not expose them to direct heat...they will melt. If you find that they melt, take the lid off and allow them to dry out before replacing their lids.

I was pretty happy with how it was looking with my photo...


I then added all of my Ephemera back on and started to adhere it to the page. I found it was easier to use a strong glue rather then double sided tape as the page had lots of textures and was a little warped!
 I also added some of the washi stickers (which don't feature in this photo).

After I had put it all together I decided that I needed a couple of feature areas close to the edge of the page to finish of the layout. I also went around the squares from the Rough Grid Template with a black pen to highlight them.
Here is the final product...


Well, I hope you have enjoyed today's post featuring Cocoa Vanilla 'You Rock' and Colour Blast Shimmer Cubes...I am so addicted to these products at the moment :)

Be sure to grab these products from the online store and share your layout when you are done on our Facebook Page! I love seeing what others have created.
If you were in the workshop on the weekend I would love it if you could share your gorgeous creations with everyone on our Facebook page.

I will back on Thursday with my next share for this month.
Have a great afternoon!
x Mel x


Friday, February 10, 2017

Perfect Day!

Hey Everyone!

Welcome to my first share for February.
Isn't the challenge set by Jane just fantastic? I just love it!
Thanks to Laura Whitaker for allowing us to use it! Laura has some great sketches available on her blog... http://scrappinaroundtheclock.blogspot.com.au/

Here is the sketch for the challenge...

The challenge not only requires you to use the sketch but to also add the following elements to your page...
* A touch of gold
* Some Washi Tape
* Include a song title somewhere on your page

Here is my layout...


It is not often that I scrap photos of me however have enjoyed creating this layout!

The papers that I have been playing with this month are absolutely gorgeous! They are Endless Summer by Cocoa Vanilla.
At Scrapbookit we stock Cocoa Vanilla goodies...it is so nice to scrap with an Australian company paper collection. They not only have gorgeous papers but sweet little embellishments, accessory stickers, flairs, woodies, puffy stickers and so much more. Be sure to check out Scrapbookit for all of your Cocoa Vanilla needs!

I have created my background on the 'Aloha Sunshine' patterned paper. I have used some water colours, splattered some Art Alchemy Acrylic Paint - Metallique Gold Rush (I love this paint...a paint that also provides dimension!) and stamped with the Kaisercraft Clear Stamp Hessian and black ink.


I have used some thin black wire to create the circle shape from the sketch and put some plain cheesecloth behind the photos!

I have used the song title 'Perfect Day' by Lady Antebellum, my most favourite band! I'm looking forward to seeing them again when they tour Australia!


How cute are the little woodies that you can get with this collection?
I have used these and some of the die cut ephemera to create some little clusters of embellishments.

I love the flowers and the gorgeous little flairs. It definitely is the best being able to buy the whole collection including all of the coordinating embellishments!


The last thing that I wanted to point out is my little '&' symbol. How sweet is that?
It is a Kaisercraft Lucky Dip Rubber Stamp. These are really cool. They come in a set of 6 and they are easy to use. These are also available at Scrapbookit. Be sure to head to our online store or email/message Jo to get all your scrappy goodies!!!

Did you know that we have a Facebook page?
Search for Scrapbookit (@scrapbookitshop) This is another way that you can enter your challenge entry...via our Facebook page!

Don't forget to work on your challenge and get it in! These super hot days are PERFECT DAYS to hide away in your scrapbooking room and create!

Looking forward to admiring your creations!
xMelx

Saturday, April 23, 2016

April Post #3

Hi Everyone,

Mel here to share with you the last of my projects for this month using some of the gorgeous products from Scrapbookit.

First of all though I need to remind you to ....
Make sure you get your entry in for this month's challenge - you still have 7 days to smash a project out and enter it in the challenge for your chance to be our next Guest Design Team Member!!!

The first project I am here to share with you is of 3 cards I have made using the left over scraps from the Simple Stories collection 'You Are Here' which I have been using this month.
They are nothing overly special but are quick and easy to make.


I need to get better at this but I always talk about finishing off a collection by making cards with the scraps rather than collecting the scraps in a folder for a later time! One day!

My second project is definitely more my style at the moment...texture and mess!
I have created this project to highlight the gorgeous colour of the Tangareen Dream Colour Paste by Colour Blast. 
I am not normally an orange sort of person but I love this!


This is one of my pages for my Kaiser Journal that I am working on this year.
I have used lots of different products to create this journal page...
Darkroom Door - Background Stamp - French Script, Kaiser Clear Stamp - Chevron, Archival Black Ink, Kaisercraft Quarters Stencil, Colour Blast - Colour Paste - Tangareen Dream and Steel, Kaiser Mists - Orange, Red, White, Turquoise and Charcoal, Washi Tape, doily, Simple Stories - You Are Here collection, My Year My Story collection (the quote), gauze and my homemade watercolours.

Here are some close ups...


Well that is all I have to share with you tonight and for this month. I have had lots of fun creating - thanks Jo for providing great product.
If you want to receive some great product from Jo be sure to get your entry in for this months challenge.

Look forward to sharing my projects for May with you soon, but before then make sure you pop back and check out what Jo has been creating!

Melx