Pages (Click Here to Visit)

Showing posts with label Kaiser Templates. Show all posts

Thursday, April 5, 2018

Cherished Friendships

Happy Easter everyone!
I hope that you all had a wonderful Easter.

I'm here today to share with you my first project for this month, April.
I'm hoping that you are encouraged to join us this month for the awesome challenge Jo has set for us!

Here is what I have come up with...


The requirements for this challenge are:

1. Friends (It can be in your photo, title, journalling, a quote)
2. Create with a colour that you don't normally use or like
3. Use die cuts on your project
4. Use stamping somewhere on your layout

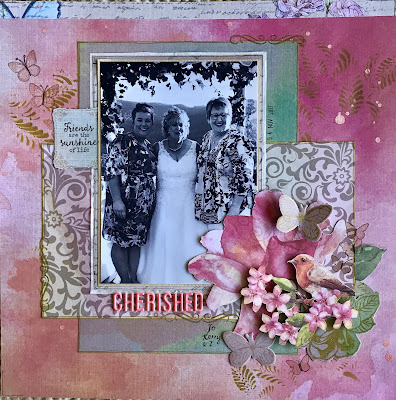
I have used the same photo as Jo this month (no we didn't plan it!!! Sorry Jo!); two beautiful friends of mine that I truly cherish. This day was a very special day and it was so lovely that we could help Jo celebrate. I have used friends in my stamp quote as well ~ Friends are the sunshine of life!


I have actually used two colours that I don't really like, PINK and GREEN. For those of you who know me well...neither of these colours enter my scrapbooking world very often (usually only if I have been challenged or it is for a gift). Saying that, I love how this layout has turned out. 


The paper collection that I have been given to use this month is by Ultimate Crafts. It is called L'aquarelle Designs.
These papers are sold in a paper pad (24 double sided papers) which is filled with a range of different colours (most of which I would not ever use) but for those of you out there that love these colours I have used, purples, oranges, butterflies, birds etc...you would love this!!

I have fussy cut from the paper these gorgeous flowers and the bird to create my embellishment cluster.


I have also used the Kaisercraft Dies and Stamps sets - Feathered Friends and Flutter to stamp and die cut the images - flowers, butterflies on some of the patterned paper. I have used the pigment ink Brilliance Pearlescent Olive for the stamping.

I have also stamped some butterflies using the Memento Ink in Desert Sand. This was a great way to stamp in a way that is very subtle.


I have used the Kaisercraft 6x6 Template - Fern in the background with the Olive Brilliance pigment ink in the background.

I have also splattered some Heidi Swapp Colour Shine - Peach in the background as well.


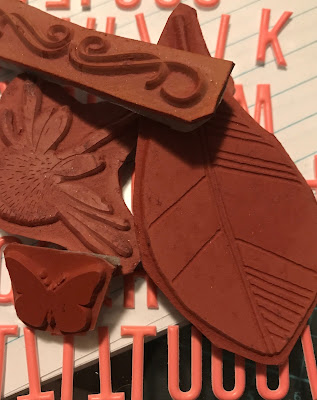
Check out these other great stamps that I have used (some of them) as part of my layout.
I have also used the cute puffy alphabet stickers you can see in the background on my layout for the title 'Cherished'


Well, I hope that you have been inspired in some way by my project today.
Most of the products that have been used on this project are available to buy in the Scrapbookit store.

Don't forget that there is a $30 voucher up for grabs for a lucky winner if you enter this months challenge.

What are you waiting for? 
Go...get started...we can't wait to see what you come up with.

~ Mel ~


Saturday, March 10, 2018

A Big ♡ For Adventure!

Welcome to Saturday!
Happy Long Weekend to those of you in Victoria!

Today I am here to share with you my interpretation of Jane's awesome challenge for this month at Scrapbookit!

The challenge requirements are:

*Use circles, hearts, rectangles and triangles on your layout, card or journal page.

*Make reference to a shape in your title ie, Circle of Life, Follow Your Heart, You're A Star etc

*Include on your layout, card or journal page a technique OR product that you have never tried or used before.

What a great list of requirements and so many things that you can do, so many ways to cover off the requirements of the challenge!

And you know the best thing...you could be the lucky winner of an awesome Scrapbookit prize! A $30 voucher in fact!!!!!

For those of you who know me...you may be aware that I have been struggling with reviving my mojo! This is what happens when you step away from your craft room for several weeks in a row...I was overseas which was amazing...but I definitely lost my mojo :(

The first decision I had to make when working on this project was what technique or product I would feature that I have never tried or used before.
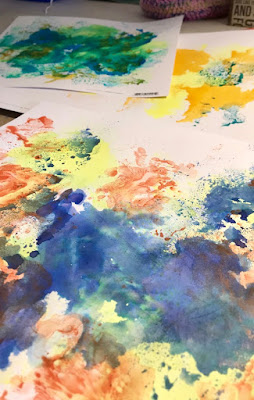
I decided in the end to go with the plastic packaging technique (I'm not sure that it has an official name) to create a background.
This took a few attempts...as you can see.


My background turned out like this...


To create this background I used a plastic package, sprayed a colour onto the plastic and then turned it over onto the cardstock and moved the colour around using my fingers.
I started with the Colour Blast Colour Spray - Saffron, I also used Dylusions Spray - Periwinkle Blue. 
I decided to see if I could get the same effect using Colour Blast Shimmer Cube - Tangareen Dream. I loved how it gave a subtle shimmer to the layout.
I then added some Colour Blast Colour Spray - Coffee using the same plastic packaging technique.

I then used a piece of cheesecloth/gauze and some Heidi Swapp Colour Shine - Navy to add small amounts of what turned out to be a grey colour.

Here are a few close ups...you can just see the print of the cheesecloth.


I then splattered a small amount of Dylusions Black Marble Spray.


Once dried, I used some of the papers from my Photo Play kit this month called Freestyle.
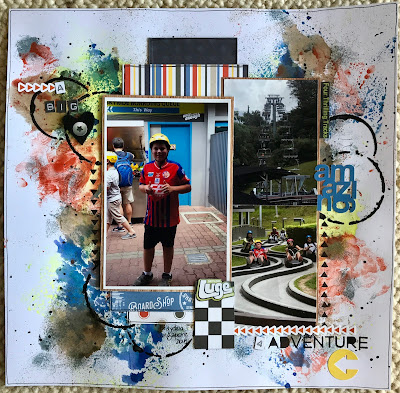
This is what I finished up with.


I have incorporated the shape part of the challenge with black paint and the Kaisercraft Mini Template Splatter for the large circles in the background. I have arranged my photos and papers in rectangle shapes. I have used triangles from the sticker element sheet from the Freestyle kit and have used a Kaisercraft Template - Quarters and my fineliner.
I have only one heart which I have cut out of black felt.

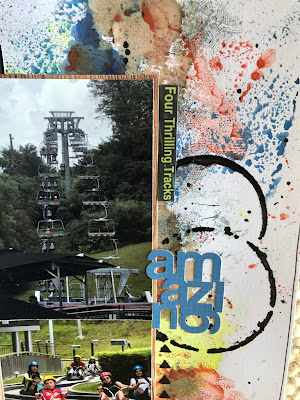
Some more close ups...

I have used the word 'amazing' from the sticker element sheet from the Photoplay Freestyle kit.
I have also used some cut out words from my photos, including the Skyline Luge Sentosa logo.


I finished with my title which I have created using the Kaisercraft Dymo Alpha Stickers in both Black and White and the word adventure from the Echo Pack Dream Vacation Stencil.


I am so happy with this layout...and I feel like I have a little of my mojo back!

Head to Scrapbookit Shop to grab some of these awesome items...the Photo Play Freestyle kit is a great boy collection!! 

Why not spend this weekend getting creative with Jane's awesome challenge??

We can't wait to see what you come up with...add your entry to our Facebook page, the blog or email it to Jo at joannecaird@gmail.com.

Melx

Thursday, October 5, 2017

Hazy Days 7 Dots Syudio


Welcome to another share of our wonderful challenge, set by DT member Mel.
 
This month we have a sketch to follow , which I love because it gives you a great starting point. We also have 5 other requirements to add to our projects. 

1. U or You
2. Circles
3. Spray
4. Stencil/Template
5. Your Favourite Product.
 
So here is my take on the challenge
 
 
This month I am creating with the fantastic 7 Dots studio's 'Hazy Days' . This range is just great to create those pages that you want to look a bit grungy. I followed the sketch and have used different pages in the range. I have used a photo that has been altered with a filter from Facebook which I thought was a bit funky. My circles are a new product from ScrapFX and are a silhouette cardstock diecut, I have sprayed sections of my background with a 'ColourBlast' spray 'Saffron'.
Using my favourite product 'ColourBlast Paste' Leather this time, I have put it through a Kaisercraft template to give the splatter effects. The funky arrows are also from ScrapFx. My title is a lightbox letter that I have just glued in place.


Because we have just been to retreat I had the opportunity to get lots of pages completed, here is another page using the 'Hazy days'.
 

Lots of 'Deep Water' ColourBlast Paste, Lindy Stamp Gang sprays,ScrapFX chipboard and Kaisercraft Templates were used to create this page.
All available instore now.

So I hope you get some time join us for this months challenge. Entry closes October 30th.

Happy Scrapping 

Jo xxx

Sunday, October 1, 2017

Welcome to October!

Welcome to October!

I am writing this post from our Spring Retreat...we have had an absolute hoot of a weekend, such a shame that anything good has to come to an end!
We have scrapped, laughed and celebrated our bride to be (Joanne ~ owner of Scrapbookit!) with a high tea and an Op Shop Bride and Bridesmaid dress up. I'm sure if you keep an eye on our Facebook page there is sure to be some photos posted!
Anyway, a great weekend!

I am here to share with you our new challenge for this month.

This month we have continued with a sketch (who doesn't love a good sketch) but this time we have a scrappy recipe to go with it.
So the challenge is to use this gorgeous Susan Stringfellow (http://sketchsavvy.blogspot.com.au/) sketch. Thanks again to Susan for allowing us to use her gorgeous sketch. To go with the sketch you need to incorporate the following five things...
1. U or You
2. Circles
3. Spray
4. Stencil/Template
5. Your Favourite Product

Here is what I have come up with...


This month I have used a variety of products. The majority of papers I have used are part of the Feature Art 'Teenagers' Collection. What great products for those teenagers in our lives!

I have started with a background "Speckled" from the Kaisercraft Basecoat IV Collection.

I have used the Kaiser 'Spotty' Template and some Heavy Gesso on the background. I then lightly sprayed over the gesso with Dylusions Ink Spray 'Periwinkle Blue.'


I used some of my favourite product Colour Blast 'Shimmer Cubes' in Sienna and Apple of my Eye to splatter around the background.

I have used the Kaiser Mini Designer Template - Splatter and the Dylusions paint 'Lemon Zest' for the larger yellow circles.

 
I then used another of my favourite products, Colour Blast Paste in Apple of My Eye, Dusty Charcoal, Tangareen Dream and Sunshine and a Scrap FX Circle Border Punch to create my circles around the layout. 

The chipboard pieces 'Aaron's Arrows' I have used are from 2Crafty. I have painted them with the Colour Blast Shimmer Cubes in Apple of My Eye, Sunshine and Dusty Charcoal.


I have finished my layout off with a little embellishment with the word "You" on it from the Cocoa Vanilla 'You Rock' Collection, some little puffy stickers from Cocoa Vanilla, a white stitch line using a gel pen, a title using the Kaisercraft black Alpha Sticker Sheet and some twine.


You have until the end of the month to get your entry in for this month's challenge.
Don't forget you have several options for entering. You can link your entry via your online space with Inlinkz (see right hand panel), email them to Joanne for her to post them or post them to our Facebook page.

We can't wait to see your entries for this month's challenge!

Thanks for stopping by and be sure to check back for some inspiration from the lovely Jane and Jo throughout the month!

~Mel~


Saturday, July 1, 2017

Welcome to July!


Hello!
Welcome to July and a brand new month and challenge here at Scrapbookit!
I am so excited for this months challenge and I hope you will be too!
So let's not waste any more time and hop to it...

Our challenge theme this month is...

1. Create a project following the 'Christmas' theme and include the following as part of your project...

2. Use the sketch (below). 
Thank you to Susan Stringfellow for allowing us to use her sketch for this challenge.


3. Letter Challenge
*Include 3 elements in your project that start with the letter C....this could be a product, the title, colour, technique etc.

Here is what I came up with...


As you can see my project is a Christmas themed layout, I have used the sketch (my layout is pretty true to the sketch) and my 3 elements beginning with C are: my title starts with C - Christmas Memories; I have used many ColourBlast Products and I have used the colour Cream!

I started with a piece of kraft cardstock and decided to create a mixed media background. I made a mess...but a very pretty one! It was lots of fun!


As you may be aware my favourite product at the moment is Colour Blast. I love all of the products but particularly I adore the Colour Shimmer Cube - Watercolours!
Onto the kraft cardstock I added some of the Bling Colour Shimmer Cube - Watercolour. You can't really see this gorgeous colour in the photo.

Then I added some of the Colour Blast - Fire Engine Colour Paste in random places around the background.

To make the cream coloured Gesso I added in some skin tone acrylic paint to my heavy gesso. After drying the colour paste I added the gesso in random places around the background.

I then altered some of the Colour Blast Colour Pastes - Fire Engine and Envy with some heavy gesso to lighten them. I used the Kaisercraft Mini Designer Template - Rising Bubbles and these colours to add some dimension into the background. Once dry I spread some Metallic Gilding Wax - Golden Light and Vintage Berry over the bubbles.


Once dry, I used some Grey Flannel Versamark ink and the Kaisercraft Clear Stamp - Music Script and randomly stamped in the background. I finished the background off with some of the gorgeous Fire Engine Colour Shimmer Cube - Watercolour to add some 'bling' to the background.


Now it was time to add some papers and other collectables to create and finalise the layout. I have been lucky this month to have used the 'Prima - Sweet Peppermint' Paper Collection. It is such a gorgeous range for all those Christmas photos! I have inked all the papers with a Encore! Gold Ultimate Metallic Ink.


I have created a circular shape using cream twine and have embellished using some of the collectables included with the paper collection, cream cotton, a gold wire star and some cream ribbon.


I used the Tim Holtz template - Arrows to create the arrows on this layout. For the colour I added some ColourBlast Shimmer Dust - Candy and the Fire Engine ColourBlast Colour Paste.

To enter our monthly challenge and have a chance of winning a gift pack, you can...
1. Enter your project on our Facebook page;
or
2. Send an email to Jo (joanne@scrapbookit.com.au)
or
3. Link your project in the sidebar using the Inlinkz linkup.

Entries are due by...July 31st, 2017.

We can't wait for you to bring a little Christmas to our challenge!!
Mel x


Thursday, June 1, 2017

June Challenge


Good Morning,

Welcome to June, yes already.
 Time is flying by, we have had such a busy time here at Scrapbookit with another successful retreat with lots of laughs, great classes, and lots of projects completed by the wonderful girls that joined us.

It's my turn to set the challenge this month so I thought I would do something just a little different.

We all have those 6x6 paper pads in our stash for those cards we are going to make one day! Well I want you to use them up on your layouts, Yes only papers from your 6x6 stash, only Geometeric shapes and some chipboard are the requirements this month.


I hope you have fun with it :).

Here is my layout I created using the papers from the new Prima 'Love Clippings' range. 


This paper pad has some beautiful 'chic' pages full of lovely flowers and my title 'Giggles' is from the alphabet stickers that are in the pad. My chipboard is from Dusty Attic and  coloured with new ColourBlast Paste 'Blush' I have used the paste with a new 6x6 kaisercraft stencil to create my lines.


Entries for the challenge close on June 30th and can be emailed to joanne@scrapbookit.com.au, added from your blog via our Inlinkz tab in the side bar, or you can upload them to our Facebook page.

Looking forward to see your take on my challenge,

Have a great day
Jo.

Tuesday, February 7, 2017


Morning,
Jo here back to share another project I have done this month with the Cocoa Vanilla 
Make a Wish range. I thought I would do a birthday layout with these fun papers. This month I also want to showcase the new mini templates from Kaisercraft which I have used on my page.


These new mini templates are an ideal size for adding random texture to your backgrounds. I have used some Dylusion's paint Bubblegum Pink and then over the top I have added some Colour Blast Paste Envy. I then heated it with my heat gun to create the bubbly finish. I then gave it a spray of  Heidi Swapp Gold mist.


My title is a Heidi Swapp sticker that I have run through my Minc machine to cover in gold, some washi tape I had in my stash and the tags are from the Make a Wish Bits and Pieces pack.

I hope you are joining in our fun challenge this month, don't forget all the product our Design Team use are available instore so if you would like to purchase any checkout the online store www.scrapbookit.com.au or if you cant find it there drop me a message.

Enjoy your week, Happy Scrapping

Jo Caird .


Wednesday, January 18, 2017

Journal Page - Good Times!

Morning again everyone!

I am loving this Amy Tangerine ~ Oh Happy Life paper collection. So much so that I just can't stop using it!!!!
Today I am here to very quickly share with you another project using this gorgeous paper collection.

I am playing a little bit of catch up with my 2016 Journal Planner. But I am having fun while I do it. I have done so much more than I ever envisaged I would at the beginning of 2016...whilst I had all good intentions.
Anyway, I have used the Amy Tangerine paper to create this page in my journal planner.


I just love how bright it has turned out!!
Alongside the Amy Tangerine papers I have used lots of mixed media products to create.
The first thing that I did to my blank page was use the large circles quarter from the Kaisercraft Grunge Designer Template with some Gel Medium.

Then using the same template I used the Lipstick Colour Blast Colour Paste.

I used the Kaisercraft Bubbles 12x12 Template and the Singin the Blues Colour Blast Colour Paste randomly around the page.

Finally, I used the circle quarter from the Kaisercraft Mixed Media Designer Template with some Envy Colour Blast Colour Paste.

I made sure that between each of these layers I dried the product before continuing.

I then used some Sunflower Colour Blast Shimmer Dust over the top and then dried this off too!


I did some really random stamping using the Kaisercraft Tic Toc Clear Stamp and Archival Ink.
I finished the background off using some white and black Faber Castell Gelatos to add some dimension to my Lipstick coloured circles.


A few different papers and some inked edges and my project is complete!

Maybe you would like to submit a project similar to this in our January Challenge?
You are only limited by your imagination!

I still have another project to share with you, but you will have to pop back later in the month to check that out!

Until then,
xMelx

Sunday, January 15, 2017

Keep These Memories!

Good Morning Everyone!

I am so excited to see the interest in this months challenge! There have been so many comments about the Mood Board and how easy it is to use. Which leads me to a question for you all...What types of challenges would you love to see here at Scrapbookit? Leave us a comment, here or on our Facebook page and let us know the types of challenges you love creating.

I'm here today to share with you another take on the Mood Board that I have created.
Mood Boards are so much fun because you can use as much as you like or as little as you like to inspire your project....and it doesn't even have to be a layout! Our challenges are not restricting you to just the creation of a layout...you can create cards, canvases, art journal pieces, Off the Page projects...whatever you are so inspired to do!

Saying that...my project today is a layout :)
Here it is...


Can you see the element/s that I have been inspired by?
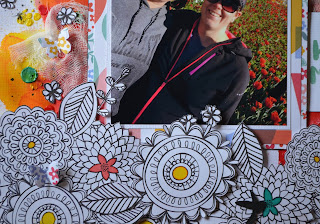
Well, my main inspiration came from the section of the Mood Board...the black and white drawing of flowers. 
One or more of the patterned papers are purely black and white...the options for this are limitless.
I have fussy cut a fair bit of the page into flower clusters to arrange at the base of my cardstock. I have used some KaiserMist - Aqua and some Colour Blast Shimmer Dusts - Candy and Sunflower to highlight a few centres of the flowers.


I have created my background using Colour Blast Shimmer Dusts - Candy and Sunflower, Colour Blast Colour Paste - Envy, Sunshine and Fire Engine and the Kaisercraft Templates - Quarters - Dots and 12x12 Bubbles.
I have also used the Black Marble - Dylusions Spray.
I added some plain cheesecloth behind the photo.


I have used some of Amy Tangerine's - Oh Happy Life paper pad to mount my photos and to cover a tag for my journalling (which is hidden behind the photo!) 
How awesome is this paper pad? Jo and Jane have also been using the same paper pad...so great to create such different layouts with the same collection. Jo has some of this in store...make sure you pop by and grab yourself some!
The collection also has some little saying squares - great for layouts and cards.


I have finished off my layout with some little flowers cut from the black and white drawing page, some butterflies and birds from Kaisercraft Decorative Dies - Birds and Butterflies, a bit of ink around the edges and some Glitter Alpha Stickers for my title.
I love how this one turned out...:)

Have you heard about the Scrapbookit Retreat??
We are holding a Retreat in Bright on the weekend of May 19-21. 
We would love you to come along.
For more details click the link on this blog in the top left hand corner!

Make sure you pop by for more DT inspiration throughout the rest of the month...still so much more to come!
xMelx

Friday, January 6, 2017

Amy Tangarine Fun


Good Morning, 
I hope you are all enjoying your break and some summer weather.
I am back today to share my take on Mel's great Moodboard Challenge also using the AmyTangarine 
'oh happy life'.

This paper pad is so versatile and there is so much in it that all 3 of our team is creating out of it.
I am having lots of fun with the bright funky colours and the Mood board has plenty of inspiration.

For my first layout featuring my gorgeous granddaughter I chose the paper sheet with doodling and black and white. I have added some colour with my copic pens and part of the quote. She certainly does leave a little sparkle in my heart.


My second page is inspired by all the bright colours, flowers and the word 'Embrace'. I have added lots of texture to my background using Colour Blast Paste and a Kaisercraft stencil. I have painted some Kaisercraft flowers with the paste to match in and I cut my title with my Curio.I added some circles with some stickers. I just love this photo (credit  Sweet as Honey Photography)


Thanks for dropping by the blog, I hope you can get some inspiration and join in, I would love to see your projects. I will be back later in the month with some more pages and Jane will be in next to share her creations.

Until then
Happy Scrapping
Jo

Thursday, July 7, 2016

Remember this Moment


Morning Everyone!

Thank you for stopping in here at Scrapbookit.

We have a great little challenge happening this month...worth a look at, why not give it a go!
Judy has designed it and there are a few elements that you need to include in your project. 

So here is the challenge...
You must follow the sketch,  fussy cut and use one or all of the following on your project - buttons, stamping or ribbon.


I have been playing with some of the gorgeous Prima papers this month. They are just beautiful and very easy to use.
Here is my layout...


I have (as always) been a little naughty and have changed a little bit of the sketch around. I have turned the whole sketch around and have moved the title from the bottom corner where the circle is to the top, right hand corner.

I started with a piece of kraft card which I lightly sprayed with Kaiser Mist - Coffee. I also flicked some Kaiser mist onto the card by undoing the lid and using the little tube that leads to the spray nozzle.


I have then cut pieces from...
* Prima Marketing - Vintage Emporium - Opera Seria paper
* Prima Marketing - Vintage Emporium - Verona paper
* Prima Marketing - Vintage Emporium - Florence paper
As well as the...
* Prima Marketing - Seashore - Seashell paper

After adhering these papers to the cardstock I used the Kaisercraft Clear Stamp - Background Script and some brown ink to roughly stamp around the layout.


As gorgeous as these papers are I was unable to do any fussy cutting from them to fulfil my challenge requirements so I had to be a little creative with my thinking.

I created my embellishment cluster using some different products and some fussy cutting.
I have used the Kaisercraft - Flora Quarters templates. With the flower template I used with some Colour Blast - Singin' the Blues Colour Paste. I lightened it a little using some of the Snow White Colour Paste. After the paste had dried I chose a few of the flowers to fussy cut. I inked the edges and gave them a light spray with the Coffee - Kaiser Mist.


I used one of the other Flora Quarters template for the leaves. Instead of using Colour Paste I decided to mix a small amount of Coffee - Kaiser Mist into some Gel Medium. Again, once dried I fussy cut the leaves.

 I have finished off my layout with some twine around the bottom of my photo and some words and some cute hearts for my title from the Kaisercraft Clear Stickers - Script Words.


Have you got your spot secured at our Spring Retreat?
October 7-9 ~ Bright, Victoria
Hope to see you there!

Thanks again for popping by...be sure to check back to see what other projects have been created by our Design Team for this challenge throughout the month.

Happy Scrapping!
xMelx